Chickpea curry

Our wonderful doula brought us this curry just after Plum was born. It was so good then, and it’s so good now. I’ve also cooked the potatoes and carrots together in the Instant Pot so that the only monitored cooking you have to do is sautéeing the onions, adding the rest of the veg and sauce, and heating it all up.

1 can coconut milk
2 TBS yellow curry paste
1 TBS palm sugar
1 tsp turmeric
1 large carrot, cubed
2 medium potatoes, cubed
1 cup green beans, cut into ½ inch pieces (I just whatever veggies are in the house – broccoli, sweet potatoes, squash, whatever)
1 can chickpeas
1 medium onion, cubed
1 tsp grated fresh ginger (or 1/2tsp ground ginger)
2 TBS of coconut oil (or olive oil)
1 tsp of salt

Heat the oil in a deep skillet. Saute the onions until almost translucent. Add potatoes, carrots, green beans and grated ginger, cook until almost soft. While that is cooking slowly whisk the coconut milk with the yellow curry paste, turmeric, salt and palm sugar. Pour over the vegetables, add the chickpeas and bring to simmer. Cook for about five more minutes. Serve over white or brown rice.

Best homemade lasagna

I talked about this on the most recent episode of Friendlier, but I thought I should share it AND write it down, so that I remember it.

Ingredients
1 lb bulk sausage (I use Harris Teeter Sweet Italian Pork Sausage)
1 onion, chopped
2 jars of pasta sauce (I use one Harris Teeter Arrabiata and one Harris Teeter Garlic Lovers)
12 lasagna noodles (regular, not no-boil type)
16 oz Ricotta cheese
2 eggs
1/2 cup grated Parmesan cheese
Freshly grated black pepper
3+ cups of shredded cheese (I use a combo of mozzarella, asiago, provolone, parmesan, romano, and fontina that comes in a bag, but you can’t really go wrong here)

Directions
Brown/crumble the sausage and fry the chopped onion in a deep skillet (I do both at the same time; you can also add some chopped garlic if that’s your thing). Add both jars of pasta sauce to the onion/sausage, turn the heat way down, cover, and simmer for at least two hours, stirring occasionally.

When the sauce is nearly done simmering, bring a pot of salted (very salty) water to a boil. Add lasagna noodles and cook a minute or two less than specified on the noodle package (this should mean very al dente noodles). Drain water and lay out noodles on a silpat, parchment, or waxed paper, so they don’t stick to each other.

Preheat over to 350. Combine ricotta, eggs, half cup of parmesan, and some freshly ground black pepper and mix until uniform. Add a little sauce to the bottom of a 13×9 baking dish (just so the noodles won’t stick), then lay out 4 noodles side by side on top of the sauce. Distribute half the ricotta/eggs/cheese mixture onto the noodles (cover as evenly as possible), then add at third of your remaining sauce and spread out. Sprinkle a third of your cheese evenly on top of the sauce. Add another layer of noodles, followed by remaining ricotta/eggs/parm, more sauce, and more shredded cheese. Cover this cheese with the final four noodles, then cover the noodles with the remaining sauce, and cover with foil. Bake in preheated oven* for 45-60 minutes. Then uncover, top with remaining cheese, and bake another 30ish minutes.

*Your 13×9 will be very full, so it’s a good idea to put your lasagna pan on top of a cookie sheet or foil on the bottom of your oven to save a mess.

P.S. I realize this is only sort of homemade because I use sauce from a jar. Oh, well.

Slow Cooker Steel Cut Oats

The only time I tried to make steel cut oats on the stove, it was a burned disaster. I was not (nor am I ever) in the mood to constantly stir the oats for the hour or however long it takes them to cook. (I actually don’t know since I’ve never been patient enough to find out. I may have been doing something wrong). Belated apologies to the ladies who had to eat slightly burny oats at my house that morning.

But I love steel cut oats. Their fibery healthfulness is matched only by their creamy yet lumpy texture (so pleasant to the palate) and their affordability in the bulk section of your neighborhood grocery. I also love how filling and warming they are, especially as the weather turns chilly.

Enter slow cooker steel cut oats! I made a batch of these once a week last winter, and we just recently started up again. I modified the recipe to make it even simpler (see below) and because I like to add a banana and some nuts to mine, but skip the sugar. I always use a can of coconut milk because it gives a creaminess to the oats that is missing if you just use regular milk or half and half. I cook them on Sunday night and then divide them up (or aliquot them, if you will) and we reheat them all week and eat them. (High five from my future self!)

Slow Cooker Steel Cut Oats

Butter
8 cups of water
2 cups steel cut oats
1 can coconut milk (don’t get the lite kind)

Butter the crock of your slow cooker REALLY well. The oats will probably still stick, but buttering really helps them stick less. Add the rest of the ingredients, give them a stir, and then cook on low for 8ish hours. Enjoy in the morning or whenever you want!

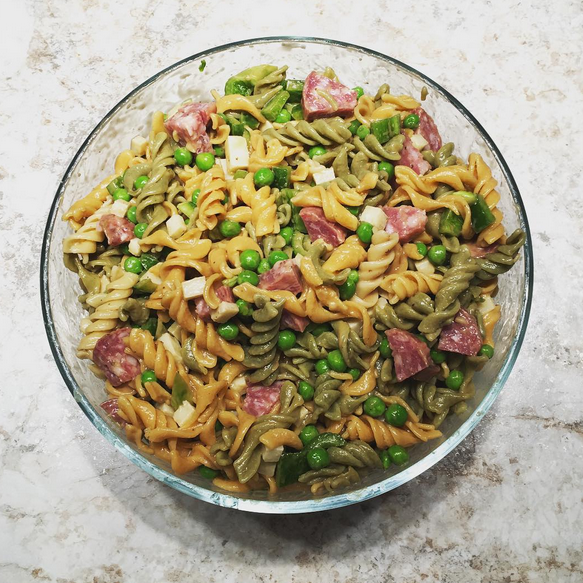
Easy, hearty pasta salad

With the arrival of fall, this pasta salad is nearly out of season. But I made it on Saturday for a picnic dinner because it’s such a good take along dish, and I wanted to share it here.

1 lb of pasta (I like colorful, spiral pasta)
1 log of salami
Pecorino romano cheese (we buy it in a wedge from Trader Joe’s)
1 or 2 sweet bell peppers (any color is tasty)
1 bag of frozen peas
1 bottle of creamy balsamic dressing (the Trader Joe’s one is legit)

Cook the pasta according to the package directions. While it’s cooking, chop the salami, cheese, and peppers into small pieces and add to a big bowl. Drain the pasta and add the still-frozen peas to the strainer. Stir the peas and pasta around, which will thaw the peas and help the pasta cool down. Add the pasta and peas to the bowl with the salami, cheese, and peppers. Pour the dressing over the top. (You might think you don’t need a whole bottle of dressing, but it will taste much better if you add it all). Stir to combine well and serve immediately, or refrigerate until you’re ready to eat.

2015-10-19 09.13.28 am


Homefermented Hard Cider

I love hard cider, especially the dryer, less sweet commercial ones that are starting to show up more in stores (Crispin is a good example). We have several homebrewing friends and when one of them mentioned that she’s been fermenting cider at home and that it’s actually SUPER easy, I wanted to give it a try.

You can start with apple juice, like this one from Whole Foods, which comes in its own fermentation vessel:

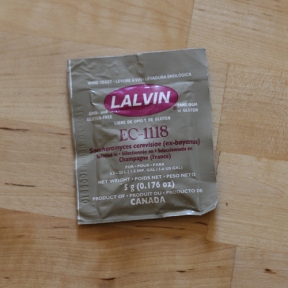
Or if you can get it, you can use cider from an orchard (that’s actually what I did with my first batch because it was fall when I started and I found local cider at our farmer’s market). So you have the juice or cider, and you have to add yeast. I used a champagne yeast that was readily available at our local brew store:

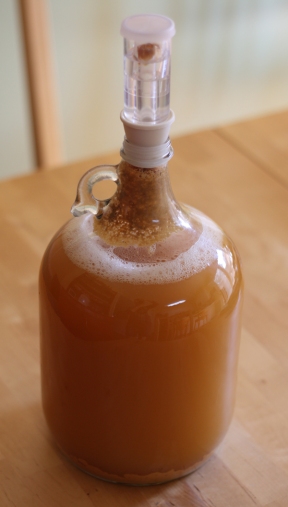
I dissolved the yeast packet in a half cup or so of boiled and then cooled to just barely warm filtered water and added that straight to the bottle. Then I added an airlock, which you can buy really cheaply at your local brewing store. The airlock lets air get out without letting microorganisms/dust/dirt in. I put the soon to be cider in our utility closet, the warmest part of our house, to ferment and forgot about it. After ten-ish days, it looked like this:

Homefermented Hard Cider | invitingjoy.net

I let the cider stay in the closet for a pretty long time after I stopped seeing bubbles in the airlock (meaning that the yeast was no longer letting off carbon dioxide, a result of turning sugar into alcohol). I could have (maybe should have) siphoned the cider off the caked of yeast at the bottom of the bottle into another fermentation vessel after the end of this primary fermentation to let the cider clear. Because I just did it all in one vessel, my cider had a little bit of a yeasty flavor, but oh well.

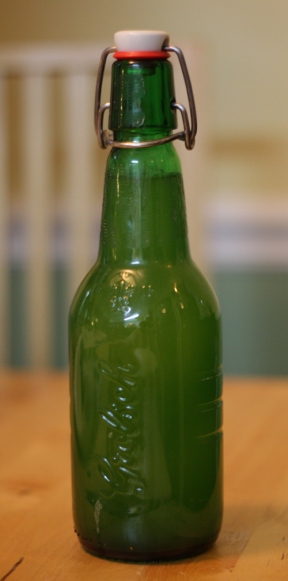
So I let the cider clear for six+ weeks and then bottled it. Before bottling I added a tablespoon and a half of priming sugar dissolved in a little boiled water, which gave the yeast enough sugar to carbonate the cider. I reused Grolsch bottles, which I sterilized beforehand, so Hubs and I had to drink eight pints of Grolsch in the weeks leading up to bottling (poor us).

Homefermented Hard Cider | invitingjoy.net

Then I put the bottles in a paper bag to keep them in the dark and put them back in the utility closet for about another month. I took one out, refrigerated it overnight and tried it in December, but it wasn’t ready yet. I tried again in February and success! I just finished the last one, and I am super excited to start fermenting my second batch.

The final product: crisp and dry with a little apple sweetness – yum!

Homemade Caramel Pecan Rolls

These are a Christmas morning tradition in my family, probably because (in my opinion) they are too complicated to do too often.  For once a year, though, they are totally perfect.  To make the dough:

1 package or 2 1/2 teaspoons active dry yeast
1 cup warm water
1 teaspoon salt
1 egg
1/4 cups sugar
2 tablespoons soft butter
3 to 3 1/2 cups flour

Dissolve yeast in warm water.  Stir in sugar, salt, butter, egg and 2 cups of flour.  Beat with the dough hook on your mixer or with a wooden spoon until smooth.  Work in enough remaining flour to make the dough easy to handle.  Place in a greased bowl (I used coconut oil for the greasing) then flip over the dough so the greased side is up, cover the bowl tightly and put it in a warm place to let it rise (or store in the fridge for up to 4 days, where it will rise very slowly). This is what my dough looked like after rising for an hour or two.  It almost doubled in size:

When your dough is almost done rising, combine:

2/3 cups melted butter
1 cup packed brown sugar
2 tablespoons corn syrup (I used this)
1 1/3 cups pecan halves

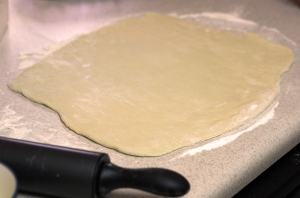
Once combined, spread mixture evenly over the bottom of a 13×9 pan.  Then roll out your newly risen dough on a floury surface (I used my countertop) into a rectangle roughly 15 inches by 9 inches.

Spread the dough with melted butter and sprinkle on cinnamon sugar (I combined 1/2 cups white sugar and 2 tablespoons cinnamon and used it all).  Then start to roll up your rectangle:

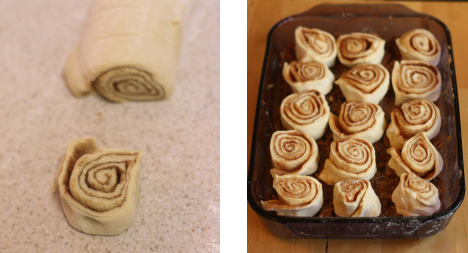
Once you’ve gotten your dough completely rolled up, cut it into 15 one inch rolls (in the photo on the left, you can see where I used a knife to mark the dough roll before I cut it) and place them in three rows of five in your pecan prepared pan:

Caramel Pecan Rolls | Inviting Joy

After this step, I stored the rolls in the fridge over night, but I’m pretty sure you could also put them in the freezer or leave them in the fridge for a few days.  About an hour and a half before you need them, put them in a warmish (~150-200 degrees Fahrenheit) oven for about an hour, until they roughly double in size and look like this:

Then bake them 25-30 minutes at 375 degrees Fahrenheit until they are golden brown on top (the photo on the left below).  The final step is to put a tray or cookie sheet face down on top of the rolls and then turn the whole thing upside down, so that the rolls fall out of the pan you cooked them in with the yummy caramel pecan goo on top (the photo on the right below).

Caramel Pecan Rolls | Inviting Joy

What are some of your holiday food traditions?

Thankful for Fiber

Rather than celebrate Thanksgiving with extended family, as many do, my family has always celebrated with the dear friends my parents made when they first moved to Dallas.  Unable to travel to their far away Yankee homes, they made their own Thanksgiving traditions with two other sets of young marrieds, who also have kids that are now grown.  Thanksgiving in Dallas morphed into renting a house in the woods, and Thanksgiving for me has always been a mini-vacation with this “chosen family.”  Hubs honors me by embracing this tradition wholeheartedly (but it’s not really a bad deal for him, as the dads of the two other families are wine hobbyists and bring tons for us to sample).

Cue us spending three days in the woods, eating amazing food (including copious amounts of cheesy appetizers) and drinking lots of wine (and homebrew this year, provided by Hubs).  This upset of the normal schedule has never caused me as many, ahem, digestive problems as it did this year.  Maybe my increased age has come with an increased need for fiber or we had more cheesy appetizers that usual, but what’s more likely is that my body is used to having a daily dose of all things good in the form of a green smoothie.  Hubs and I splurged for a Vitamix blender on our birthdays (they are three days apart) this year and we’ve been having green smoothies for breakfast just about every day since then.  I didn’t think about not having them while we were away as being a problem, but at the risk of getting too real with the interwebs, it WAS.

So after getting back last night and more importantly, getting back to the green smoothie this morning, in addition to being thankful for the seemingly unconditional love of my husband, our pets, and all of our family, my good fortune to be a woman in the United States, our jobs and consistent income, and all the wonderful people I have the privilege to know and love, I am also thankful for fiber and that I have the means, the access to ingredients, and the time to enjoy a green smoothie every day.

Green Smoothie
4 Large kale leaves (including stems) or several handfuls of spinach
2 bananas, peeled
Large handful of frozen fruit
1/2 cup unfiltered apple juice
2 cups water

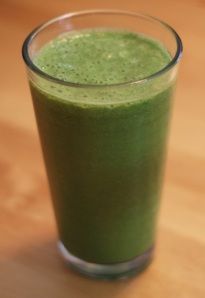
Put it all in the Vitamix and blend.  Put it in a clear glass/cup and take it to lab with you if you want to gross people out.

Baking with Auntie M

Hubs and I took a trip to see family in Minnesota and got to spend time at several state parks (we saw two bald eagles and a black bear!), but really the best part was getting to be with my awesome relatives.  I’m so happy to be related to them.  These people are smart, interesting, and funny.  They also still seem to like me in spite of the fact that I regress to the maturity of a two year old, complete with a crying tantrum, when they beat me at cards.  (To be fair, I had been losing at all the games we played ALL WEEKEND and there’s only so much of that a reasonable person can take.  Please see this study, which corroborates the idea that self-control is a resource that can be depleted by difficult tasks).

The last night we were there, my aunt baked an amazing red velvet cake that really changed my mind about cake mixes.  Before, I felt like there was going to be no way I ever baked a cake from scratch because it seemed really challenging and like they just don’t taste as good.  I realize now how wrong I was and how excited I am to try some cakes from Whisk Kid.  The recipe follows, and it’s best eaten with people you love:

Cream together (with an electric mixer of some type):
1/2 cup of vegetable shortening
1 1/2 cups white sugar
2 eggs

Make a “paste” and add it to your already creamed mixture:
2 T cocoa (unsweetened kind)
2 oz red food coloring
2 oz red water from rinsing out the food coloring bottle (You’re actually supposed to put a whole ‘nother 2 oz of food coloring in, but Auntie M can’t stomach the cost or double the Red Dye No. whatever.  It’s plenty red as you can see.  Also, watch out if you have a wooden countertop and spill any red on it because that is never coming out.)

Now mix that sucker and add:
1/2 t salt
1 t vanilla

Mix and then add alternately while mixing:
1 c buttermilk (split up a bit)
2 1/4 cups of flour (split up a bit)

BEAT and BEAT

Mix 1.5 t of soda with a tablespoon of vinegar (it should fizz in a fun way) and then fold gently into the batter.  Then bake it in two 8 or 9 inch roundy pans for 30 minutes at 350 F (or until a toothpick inserted in the center comes out clean).

While it was baking we started the icing.  This part is kind of gross because first you make a paste like when you do papier-mâché and then you cook it to thicken it up.

Combine:
5 T Flour
1 c Milk
Stir and pour through a sieve to get the lumps out.  Cook over medium high heat stirring constantly until it turns into a paste, then boil and stir about a minute.  Then remove from heat, put on the lid, and let it cool to room temperature.  While it was cooling, we ate dinner, but before that we got out 2 sticks of salted butter to soften at room temperature.

Later, cream together (until light and fluffy):
2 sticks (1 c) of softened butter
1 c granulated sugar
A splash of vanilla or almond or whatever flavoring suits you

Then add your cooled paste that you made earlier to your butter and sugar and beat it until it looks like icing.  Frost your yummo cake and don’t forget the SPRINKLES!

Cooking with Cheese

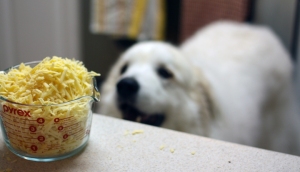
Last night I made Grandma’s version of mac and cheese, which is baked and is one of those wonderful recipes with only a few ingredients.  It can’t really get any better, especially when I, um, triple the amount of cheese the recipe calls for.  The very best part, though, is how much Tonks and Duncan love cheese.  Tonks knows very well that she’s not supposed to be in the kitchen, but this is what happens:

It's so close!

And when I remind her, “No dogs in the kitchen,” she goes just past the peninsula and waits with this goofy grin on her face:

I am ready for CHEESE!

And to be honest, I really can’t resist it when she looks so happy, so I ask her for a sit and a down and then give her some cheese.  The minute I do that, someone else, who likes to keep me company by sitting in a bar stool while I cook and tries to nonchalantly sneak onto the counter all the time, is all, “Look how cute I am.  And even though I am a cat, I also know how to sit on command.  See?”

They have me trained pretty well, I think.

Here’s the recipe:

Bring enough water for 16 oz pasta (we use organic rotini) to a boil and add the pasta.  Boil until it’s the tenderness you like, stirring enough that the pasta doesn’t stick together.  I like it slightly mushier than al dente.  While the water is boiling and pasta is cooking, preheat your oven to 325ºF and grate up your cheese.  I used 4 oz gruyère, 6-8 oz smoked cheddar, and 6-8 oz aged English cheddar, though I’ve successfully made this dish with sharp cheddar already grated from a bag.  Grated, these blocks of cheese made about 4-5 ish cups of cheese (as you can see in the photo above).  In this time, you should also cut up 4 tablespoons of butter (I use salted) into 1/2 inch square cubes.  When the pasta is done, drain it and spread about 1/3 of it in the bottom of a 13×9 oven safe dish.  Sprinkle 1/3 of your grated cheese evenly on top of the pasta.  Layer another 1/3 of your pasta and another 1/3 of your cheese and once more again until you’re out of pasta and you end with cheese.  (You should have three layers of pasta-cheese).  Add some salt and freshly ground pepper to the top of your layers.  I try not to add too much salt because Hubs and I have been ruining dishes lately because you can’t un-salt things.  Plus, cheese is pretty salty inherently.  Then pour 1/2-2/3 cups of milk over your casserole and dot your cut up butter evenly on top.  Bake for 25ish minutes or until the cheese is bubbly.